
Engineering / Structure Team Guide
Authorship
This guide was written by Bill Allen, Bruce Urban, and Dee Urban.
2012, 2014, 2018, 2019 updates and reformatting by Joshua Diamond.
Introduction
The goal for this guide is to provide a step-by-step approach to teaching a Destination Imagination team about building structures in a way that doesn’t constitute interference. This guide is not written with any particular Engineering Challenge in mind. It intends to simply provide generic structure building knowledge. Anyone reading this guide should be aware that the team must thoroughly read and understand the rules for the current year’s Engineering Challenge – because this guide might suggest techniques or materials that are not allowed this year.
This guide will cover:
- Tools, safety and environmental issues.
- Glue and material characteristics.
- An introduction to the art of gluing.
- Issues that can impact the consistency and quality of structures.
- Where teams can go to learn more about Structure design theory.
Tools and Safety
As a Team Manager, there will be some preliminary details that need to be addressed before encouraging the team to do any building. The most important is safety. Taking the team on a field trip to visit a school wood shop (or even the local hardware store) for a lecture on tools and safety is a nice way to start the year. This should be a general lecture – so it is probably a good idea to only tell the lecturer:
The team must design and build their structure completely on their own. The goal for this lecture is to teach the team about tool use and shop safety. It would be best if you avoid asking the team specifics about what they must build.
There are many tools for cutting and forming material. Nearly all of these tools are VERY sharp. Some good general safety rules are:
- Sharp edges should always be directed away from flesh.
- Wear eye protection while cutting and shaping things.
- It is easier to safely control a sharp blade than a dull one.
Additionally, there are safety rules relative to glues, adhesives, accelerants, etc.:
- Wear eye protection when using sprayed materials such as glues or accelerants.
- Use gloves when working with instant adhesives or other materials which might harm skin.
And remember: If there is a job to be done, then there is most likely a tool specifically designed for that job. Using the right tool for the job is always safer than using an inappropriate tool.
Testing Equipment
NEW
This section does NOT apply to the 2019 and later Engineering Challenges!
Please see your Challenge for the appropriate testing setup.
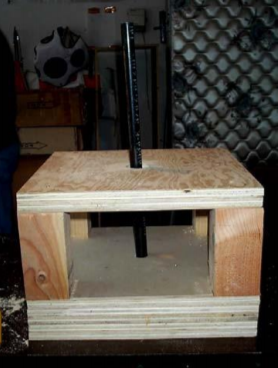 Most (but not all) Engineering challenges require a Structure Tester and weights:
- Instructions on how to build a Tester
- The Tester and weights do NOT count against the team’s budget as specified in the Challenge.
- The team does NOT need to build the Tester themselves:
- It is NOT interference for the Team Manager or another adult to construct the Tester.
- NYDI has a few Testers available for rental (contact your Regional Director for info).
- The team does NOT need to bring a Tester or weights with them to the Tournament.
Some Challenges require different or additional testing equipment! This equipment will be described in the Challenge, including any rules concerning who is allowed to construct it.
IMPORTANT
It is critical for teams to have access to the required testing equipment early!
Teams that test structures more often consistently score more highly at tournament!
Cutting and Shaping
Razor saws, razor blades, and utility knives such as X-acto knives are the most commonly used tools for cutting material that is moderately soft (e.g. balsa wood). This does not guarantee that these tools will be effective for cutting something harder and/or more brittle than balsa. In fact, trying to cut hard materials with tools intended for cutting something softer can be dangerous (and can ruin the tool). Teams should experiment with different tools to determine which works best with each material they consider, and may consider seeking skills training on this topic. Finding the right tool for the job can save significant time and aggravation.
A razor saw is usually used in conjunction with a miniature mitre box (to help make sure the cuts are square). A block of wood attached to a base works almost as well as a mitre box for making 90 degree cuts. Razor blades can work well for softer material – but tend not to work as well as razor saws, especially for harder material. When experimenting with different tools, the team should look at the resulting cuts under a magnifying glass to see if there are any undesirable local effects happening to the material during the cutting process (such as crushing of the material near the cut).
In looking at the best way to cut very hard, brittle material, it might be useful to consider how glass and ceramic tile are shaped. One method is to score the glass at the desired length and then break the glass along the score line. There are special tools (with VERY hard cutting edges) for scoring glass. Another method used to shape glass is to use a grinding tool (files, abrasive disks, etc.).
Shaping is different from cutting, even though the same tools are often used to shape materials. Shaping usually removes a small amount of material at a time, while cutting separates materials into distinct pieces. Sanding and filing are examples of shaping. As a general rule, shaping/sanding is done by using progressively finer grades of sand paper. Shaping techniques are often used in conjunction with cutting – because it leaves the ends of the material in the best condition.
Some materials start out as a malleable paste (or even a liquid). These materials must be fired – or allowed to set – before they become hard and strong. Clearly, the job of making a pot would be much harder if the ceramic were fired before it was given the desired shape. Teams should also notice that materials can change in size or shape during the firing or setting process.
Mail-order tools, glue and wood
While it is possible to purchase almost anything a team might need at a local hobby shop (or hardware store), many teams have found that a broader array of material (with more consistent quality) is available for online purchase or via mail order. It is not uncommon for material in different bins at a hobby shop to get intermixed – which could result in a team inadvertently using a material other than what they intended. On the other hand, the team might like the opportunity to hand select their material before they purchase it. Regardless of the source, it is the team’s responsibility to make sure that only materials allowed in the Challenge specification are used to construct their Structure.
SIG Manufacturing is a supplier of tools and supplies for model airplane builders. Their catalog (which is available online, or provided free with a minimum purchase) is filled with tools and supplies that have potential for use in building all kinds of structures (not just balsa). The tools and materials offered in the SIG catalog are intended for the model airplane builder. Consequently, not all of them are relevant to Destination Imagination Structure builders. This also means it is not interference for the team to read any suggestions in the SIG catalogue. The information in the SIG catalog is generic information – so it can not be interference. However, the team should decide which of the information (if any) they choose to consider relevant to their efforts:
SIG Manufacturing Co., Inc.
(800) 247-5008
http://sigmfg.com
Another source for tools and building materials is Micro-Mark:
Micro-Mark
(800) 225-1066
http://www.micromark.com
Specialized Balsa Wood is, as its name implies, a supplier of balsa wood for hobbyists. They carry almost any shape, thickness or density one could reasonably imagine, and their staff is very helpful. One nice feature which they offer is a balsa selection service, in which they will (for additional cost) source and ship balsa pre-selected for a specified density (e.g. 1.8 grams per 1/8″ square by 36″ stick). They also offer tools and glues for balsa:
Specialized Balsa Wood, LLC
(970) 461-WOOD (9663)
http://www.specializedbalsa.com
It is not generally considered interference for a Team Manager to purchase a broad array of glues (or other materials) and have those materials available for the team. However, collecting potential materials is often a fun field trip or group web activity for a team. Team managers should remember that the material selection (and construction) processes are part of the team’s solution. This means the team should make all decisions about what materials to use, how to use them and how they will build their structure.
Team Managers should encourage their team to read the Challenge thoroughly, and brainstorm their options before they settle on which materials they want to use. It is also a good idea to encourage the team to revisit this brainstorming process at several points during the year to see if they want to reconsider their alternatives. It is very common for inexperienced teams to prematurely select a narrow field of materials and construction methods early in the design and development process. This can lead to ignoring some of the more innovative and potentially effective options which may be available to the team.
Workspace considerations
Most first time Team Managers won’t figure out that their kitchen table is a bad place for the team to build structures until the table is covered with glue and razor saw cuts. These are wonderful mementos of that first year. However, anyone who won’t treasure these mementos may prefer to set up a sturdy but expendable table in a well-lit, well ventilated location — and insist that all structure building be done there.
More importantly, having a dedicated workspace can make your team more effective. Less time is spent setting up the workspace at the beginning of meetings, and taking it down again. Tools and supplies can have regular storage locations. Jigs, cutting rigs, and other constructions (see below) can remain in place from meeting to meeting. Additionally there is a certain rigorousness and discipline which comes from deciding on a plan of what is going to be done, and then going into the workspace to do it.
Work surfaces:
- There are some types of plastic (e.g. polyethylene) to which most glues will not adhere. Hard, flat cutting boards of this material can be made to provide a consistent (and disposable) surface for the team to work on. It’s also possible to buy sheets of this material to try to protect the table. The team will wreck the table anyway — but the cutting boards might slow the inevitable (and provide a consistent surface for the team to work).
- Another option is to get a large sheet of ¾” MDF (medium-density fibreboard) and clamp this in place on top of the table, or better, just lay it on top of some saw horses. Alternatively, use multiple smaller (say 16″ x 48″) task-specific MDF sheets (one for cutting, one for gluing, etc…), and clamp these in place when needed.
Lots of light is a key element to an effective workspace. In addition to good overhead lighting, it’s generally a good idea to have desk lamps available. A scale capable of measuring to 0.01 grams is a huge benefit. Aside from measuring the weight of the finished structure, a sensitive scale is extremely useful in tracking the weight of components.
White boards, flip charts or large Post-it self-stick easel pads are useful tools to facilitate brainstorming. Plenty of graph paper, rulers, pencils, squares, and protractors are handy to have around so the team can draw out design ideas. Calculators (or computer spread sheets) can be very handy to aid the team in planning how much they expect their structure to weigh. A first-aid kit will be needed at some point – so have one handy. A lot of trash will be generated – multiple trashcans might help contain the mess.
Glue selection
For the purposes of this discussion, we generally use the term “glue” to refer to any adhesive or bonding agent, but note that some Challenges may limit which types of glues or adhesives are permissible. The Team Manager should review the safety recommendations on all glues made available to the team, and be prepared to accommodate any safety concerns noted on the packaging. It would not be interference for a Team Manager to say “this glue is too dangerous, you can’t use it”, but we have found that most glues – including those which bond instantly – do actually present a problem. There is a huge variety of glue out there. Teams should see this as an opportunity to do research, conduct experiments and determine which glues work best for them. If the Challenge provides a loose definition for “glue”, the team should consider the viability of materials not formally labeled as “glue” in constructing their Structure.
Mixing glues together should be discouraged (from a safety standpoint). The chemicals in some glues can react in unpredictable ways. The team should understand that glues interact differently with different materials. Consequently, something a subtle as surface texture or porosity of the material to be glued could have a SIGNIFICANT impact which glue is best for a given application.
The team should also be aware that some glues stick to skin better and faster than they stick to anything else. Usually, there is something called debonder sitting on the shelf (or in the catalog) right next to this kind of glue. Debonder will soften the glue – so it lets go of most of the skin. In many cases, acetone (or finger nail polish remover) will act as a debonder for glues that adhere to skin. Teams can also purchase low cost painter’s or surgeon’s gloves at most hardware stores and pharmacies to protect their hands from the glue.
The team should get in the habit of wearing safety glasses while doing construction work of any kind. There isn’t much flying debris from gluing a Structure together. However, safety glasses make it difficult to rub irritated eyes with glue-coated hands. With practice, the team will master the art of gluing things together sufficiently that their hands will not get covered in glue.
Glue selection is a very important variable the team has to work with in designing and building their Structure. It is not interference for a Team Manager to purchase a broad variety of glues and have these available for the team. However, since the Challenge specifications may allow material not labeled “glue” to be used, it could be considered interference if the Team Manager suggested “glue-like” materials for the team to evaluate. Glue selection is best done through team brain-storming and experimentation.
The way brainstorming works is the team tries to think of all possible properties of glue. They then prioritize that list to identify which of those properties are the most important. They also devise tests they can conduct (and measures they will use) to aid in their assessment of which glue(s) they like best.
Keep all lists the team generates during this process. Revisit this process a couple of times during the year. As the team gains more experience, they will likely view things differently. Since this is so critical, here is a “starter set” of properties the team will likely develop:
- Can the glue be used safely?
- How strong is the joint created with the glue?
- How easy is it to create a joint with the glue?
- How consistent are the joints created with the glue?
- How long does the glue take to set?
- How much weight does the glue add to the structure?
These are just a starter set of characteristics.
The team won’t be able to decide which glue works best for them until they’ve gained some experience building things using only the materials available in the Challenge. A team can gain experience gluing things together by building simple 2-d shapes, art or even short, simple structures (without worrying too much about the Challenge specifications). The goal here is for the team to develop a facility with building – which means an understanding of how to shape materials, glue pieces together and construct something to a plan. Until they develop this facility with building, it is pointless for them to get too serious about building complete structures which meet the detailed specifications of the Challenge.
In the end, different team members will likely develop a preference for different glues – or different approaches for building structures. This can be used to the team’s advantage! Encourage team members to engage in build offs – where each team member builds a structure to the identical plan (which could be smaller than a competition structure) – holding as many things constant as possible. This means that the only differences between the structures are the different glue and/or construction approaches (and the different builder). Compare how much the resulting structures weigh and how much weight they support. At first, the team will be amazed at the variability in the structure weight and supported weight of these “identical” structures. Once a team can make consistent glue connections, the next exercise should be to reproducibly build a simple structure to a plan, have it weigh about the same each time it’s built and hold a similar amount of weight. Until this level of consistency is accomplished, it will be almost impossible for the team to determine whether there is a significant difference in the performance of two structures they build – or whether the difference in the performance of the two designs is simply demonstrating variability in the construction process. It takes a lot of work to get to this point – so what the team builds during the early days should be pretty simple. Again, the focus of the early structures should be gluing and construction technique (instead of high weight-held). Teams should be encouraged to celebrate the accomplishment of learning to use the tools and successfully building ANYTHING during the early parts of the season.
Material selection
If the team members use whatever materials they happen to lay their hands on to build their structures, it’s guaranteed that some of those materials will be stronger than others. In many structures, once the weakest piece fails, the structure collapses. In the real world, engineers carefully define the properties of materials to be used in construction – and then conduct quality control inspections of the available material to make sure the material used actually meets the intended specifications. For example, an engineer might specify the composition, manufacturing method and surface treatment of a beam. Engineers do this because any of these details can alter the strength of the finished product significantly.
Two outwardly “identical” structures can differ by hundreds of pounds in the weight they will support. Understanding the properties of the available materials – and how these properties can be used to optimize a structure design – will enable the team to build stronger structures. Equally important, it will allow the same structure to be rebuilt and hold a similar amount of weight.
What are the properties of materials? Which are relevant to structure design? The list of potential properties is actually short enough that it makes sense for a team to brainstorm the list for themselves. Once they’ve generated this list, they should devise some experiments to test which of those potential properties are most relevant in this context. Here is a fun exercise for a structure team to do along these lines:
Materials:
- Have the team pick out and/or create a variety of test pieces using a range of the available materials.
Some useful tools:
- A gram scale capable of measuring to .01 gram. **
- A micrometer (or vernier caliper) capable of measuring to .001″. **
- A powerful magnifying glass
- Something to cut a variety of materials (i.e. razor saw)
- A ruler (preferably metal)
- Pencils and “lab books” (for team members to keep notes)
** If the scale and micrometer aren’t available, the team can still take qualitative measures of the width and weight of the samples (i.e. compare the size and weight of samples to each other and record the apparent order), or make a simple balance like a teeter-totter.
Activities:
- Have the team members pick out test pieces that look or feel “different” from each other.
- Have the team cut these into samples of given lengths (i.e. 1″, 2″ and 4″).
- Have each team member take notes on the characteristics that appear to vary between the samples.
- Have the team members bend, pull, twist and compress the samples using their fingers – and record their observations. Of course, more formal testing will allow even more definitive conclusions.
- Encourage the team members to look for patterns.
This exercise encourages the team to observe, measure, question, organize and test their ideas. Not a bad start to their year!! It’s also likely they’ll learn a bit about the characteristics of materials that will enable them to make stronger, more consistent structures. Of course, it’s tough for the team to know what’s “relevant” until they’ve built a few structures. As the team becomes more proficient in building structures, they’ll also become more discriminating on the characteristics of materials that can influence the strength and/or consistency of their structures. Consequently, it’s a good idea to have the team go through this exercise several times during the year.
Gluing technique
At first glance, gluing two pieces together sounds trivial. However, structure builders strive to glue pieces together so the joints are consistently strong, yet do not use excess glue. The key here is consistency – a consistently strong joint and a consistent amount of glue used.
Think of gluing two billiard balls together. The billiard balls would only contact each other at a single point. The gap between the balls gets relatively large as you move away from the contact point. Consequently, it would be almost impossible to get a good, solid glue connection between the billiard balls – no matter how much glue was used.
Now think of gluing two sheets of glass together. A single drop of glue would spread to a very large area when the two sheets of glass were pressed together. Consequently, even a few drops would make it impossible to separate the two sheets of glass. If you put a drop of water between two sheets of glass and then apply pressure, you’ll see the size of the drop increase (and then decrease when the pressure is removed).
If you look at nearly any material under a microscope, there will be peaks, valleys and even tiny cracks – even if the piece appears smooth to the naked eye. Trying to glue two pieces together that still have significant irregularities on them is a little like gluing billiard balls together. Conversely, the team should be aware that sanding material can cover the surface with dust – which can prevent the glue from properly penetrating (or adhering to) the material. In short, gluing things together is something of an “art form”. “Foreign material” on surfaces to be glued can prevent the glue from adhering properly. This means the team should wash their hands before doing any serious gluing. Some glues can be dangerous if ingested. This means the team really should not be eating while they are working with glue. Some glues are irritants. This means the work area should be well ventilated.
Pressure is also a key element in gluing anything. Take a wet sponge and set a dry sponge on top. The upper sponge will get a little wet on the surface, but the water will not penetrate too deeply into the upper sponge. Now apply pressure to the two sponges. Water will not only soak into the upper sponge, but will likely squirt out all over the table. This is an excellent analogy to what can happen when you glue material together.
Glue adheres two strips of material together not by simply forming a layer between the two strips, it can actually penetrate into the material. Too little pressure and the glue won’t penetrate properly into the underlying material. It takes experience with the material being used to learn to apply the “right amount” of glue (and the “right amount” of pressure). Of course, the “right amount” will vary for each combination of glue and material (as well as with the type of loads the joint will experience).
If instructions aren’t included with the glue, the team might want to write to the manufacturer to see if the manufacturer will provide instructions for creating strong, consistent glue joints using their product (without telling the manufacturer the details of the project the team is involved in). Again, generic knowledge is not Interference.
The process of applying pressure while the glue is drying can lead to “residual stresses” in the Structure. This can either weaken or strengthen the structure. Engineers sometimes intentionally put residual stresses into materials to protect them in some loading conditions. Again, this represents an opportunity for the team to conduct systematic experiments.
Since gluing expertise is key to building strong structures, it’s a good idea for a team to begin simply gluing material together – without trying to build anything in particular.
They should carefully examine the joints they create:
- Are there “gaps” where the material isn’t glued together?
- Did the glue squirt out of the joint area?
- Was there complete adhesion between the glue and the underlying material?
They should then push, pull and twist the glued material to see how strong the joint is (and how it fails). A well-glued joint is often stronger than the underlying material – so the material around the joint will break before the joint fails. Armed with these observations, the team can brainstorm refinements to their gluing technique – and then glue some more!
Building to a Plan
Of course, the first requirement for building something to a plan is to have a plan. Quick sketches are adequate for brainstorming. Ad hoc structure building makes it possible for the team to visualize how elements will go together much easier than is possible on paper. However, ad hoc structure building does not lend itself to building strong, repeatable structures. It’s a good idea for teams to get in the habit of making a detailed “scale drawing” before beginning “serious” construction.
For some structures, enough symmetry exists that a single “side view” is enough to fully describe the structure. However, for most structures, at least two “views” are needed. More complex structures might require any of the following to fully characterize:
- a “side view” for each side
- a “top view” (looking down on the structure)
- “sections” (imaginary “slices” through the structure)
- “detail views” (which, as the name implies, provide a close-up look at some aspect of the structure that is not 100% clear in the other drawings)
In the “real world”, there might be even more detailed drawings:
- “Isometric view” (rather than drawing the structure “straight on”, this view is from up and to the side a bit. This allows the top and two sides of the structure to seen in the drawing – and aids in visualizing what the 3-D structure will look like)
- “Exploded view” (this pulls all the individual pieces away from each other – so HOW they are assembled can be captured in the drawing)
It can be fun for the team to put a date on their drawings – as well as which team members participated in the design, drawing and construction. Some teams like to give each design a name (and put that on the drawing as well). It is MUCH easier for team members to communicate ideas to each other when they can describe a test Structure as “zeke37” than it is to have to say “that Structure we built last Tuesday with the new bracing idea”.
It is usually a good idea to photocopy the drawings and collect them into a binder (so a key drawing is not lost or damaged). Of course, all the information the team feels it needs to know about the design to be able to re-create it should be recorded as well! A lab book where team members record this information as they do the construction can be a big help in recalling these “details”. It is AMAZING now much a team can forget between meetings. Similarly, it is equally amazing how even a few notes can help the team to recall everything they appear to have forgotten!
Many teams photocopy each side of a finished structure. This captures the “as built” structure (which can be compared to the “as designed” structure in the drawings). The team should be aware that many photocopy machines shrink (or enlarge) the image slightly. Consequently, it’s prudent to put a ruler in the image (to provide a “true” scale). If the structure stays more-or-less intact, a photocopy of the “crushed” structure completes the picture. However, some structures come apart so completely when they fail that the “crushed” image can be pretty useless.
It can be challenging for a team to decide where their structure is weakest if it fails in a manner that leaves little of it intact. There is generally a “domino effect” – where different elements of the structure fail in rapid succession. Quite often, the most dramatic (i.e. twisted) elements were the LAST to fail. Consequently, simply looking at the wreckage can be misleading. If a Structure Tester has good Safety Shields (as it should), a team member can get down where they can see the Structure clearly as it is loaded. This can allow them to see which element of the structure is “giving” before the structure fails. A video camera can also be useful for this. However, for many structures, the video camera will show an intact structure in one frame – and a blur in the next.
In addition to the “relevant details” for re-creating the structure, the team should record the structure weight and the “weight held” for the structure. This should make it easier to see what changed between their structures – as well as the impact each design change had on these key variables. One useful insight from this approach is that it’s probably a good idea to not vary the design too dramatically between tests. If there are too many variables changed at once, it can be difficult to determine which is impacting any improvement (or degradation) between structures.
A 1:1 scale drawing means that 1″ on the drawing represents 1″ on the structure. For many teams, a 1:1 scale drawing is used as the “template” to construct their Structure. This can be as simple as laying the pieces to be glued on a photocopy of the drawing to get them in the right position (a piece of plastic wrap placed over the drawing will help keep the Structure from getting glued to the drawing). However, a “construction jig” which holds the pieces to be glued firmly in place will allow the structure to be assembled even more exactly (and consistently). If a Challenge offers the opportunity, molds or even extrusion techniques might be employed. The team must design and build ALL “construction aids” (other than “off the shelf” tools) used to build their Structure.
A jig doesn’t have to be complicated. Laying a drawing on a piece of cork board and setting pins in the drawing to act as “stops” to hold the material in place can be effective. The same plastic used to make the “cutting boards” can be cut into strips to be used as “stops” and “spacers” as well. The material to be glued could also be held in place by magnets against a metal background. It is also possible to cut shallow grooves in something to hold the material to be glued in place.
These examples are certainly not the ONLY way to build construction jigs. The team should experiment with the above approaches (to get some experience in the use of jigs) and then brainstorm all the approaches to construction jigs they can think of. They should build and test some of these jigs to see which they like best. The team must decide what construction jig(s) (if any) they decide to use. In addition, they must construct any jigs they use for themselves. Moreover, it would be Interference for a Team Manager to insist the team must use a jig – or to dictate the kind of jig the team should use.
Using jigs takes a bit of getting used to. Consequently, teams should try out different jigs (or no jig) as they gain experience. Their preferences (and their results) will likely change with experience.
Part of building to a plan is planning out the order elements of the structure will be assembled. It can be very difficult to anticipate how “details” (like overlap areas needed for gluing) will affect assembly. Some “quick and dirty” ad hoc constructing of key elements of a structure is probably the fastest and easiest way to uncover assembly issues. It is very common for teams to assume a structure can only be assembled in one order. It’s entirely appropriate for a Team Manager to encourage the team to brainstorm alternate assembly orders/processes – but the team must come up with the results themselves.
Following the above steps, the team should be able to pick out a glue, select materials, glue material together, create a plan and build to that plan. The next step is to learn enough about what makes strong structures to develop a plan that will hold significant weight.
Design Basics
Start by getting a couple of good texts intended to teach the team design issues. Here are some books recommended in Rosemary Bognar’s Resource list (ordered by age recommendation):
- Messing Around with Drinking Straw Construction, Bernie Zubrowski, Little, Brown & Co, Ltd, 1981, ISBN 0-316-98875-8, 164 pgs, Grades 3-Adult
- Building Toothpick Bridges, Jeanne Pollard, Dale Seymour Publications, Palo Alto, CA, 1985, ISBN 0-86651-266-7, 32 pgs, Grades 5-Adult
- Structures, Bernie Zubrowski, Cuisenaire Company of America, White Plains, NY, 1993, ISBN 0-938587-35-8, 96 pgs, Grades 5-Adult (Excellent)
- The Art of Construction, Mario Salvadori, Chicago Review Press, Chicago, IL, 1990, ISBN 1-55652-080-8, 200+ pgs, Grades 6-Adult (Excellent)
- Structures or Why Things Don’t Fall Down, J. E. Gordon, DaCapo Press, Inc., New York, NY, 1978, ISBN 0-306-80151-5, 395 pgs, Grades 9-Adult
- Why Buildings Stand Up: The Strength of Architecture, Mario Salvadori, W. W. Norton & Company, New York, NY, 1980 ISBN 0-393-30676-3, 323 pgs, Grades 9-Adult
These can be hard to find in bookstores or libraries. However, they all can be ordered on the web from http://www.amazon.com.
The kids will learn that their structures must have:
- Strength
- Stability
- Manufacturability
The specifics:
Strength
Buckling is a failure mechanism where long, thin members loaded in compression end up “bowing” (and eventually breaking) near their middle. This is by far the most common mechanism for failure of structures in compression. Buckling depends on:
- Length (shorter members support more load than longer)
- Cross section (fatter members support more load than thinner)
- Material properties (stronger material supports more load than weaker)
There is another kind of buckling called “thin wall buckling” – where “wrinkles” develop in a thin wall. There are also such things as “stress concentrators” – where abrupt changes in geometry lead to higher “local” stresses. While the theory associated with these can be understood from texts, building that testing structures that vary key parameters is probably the “best” way to determine the effects this sorts of things have on a specific design.
Stability
A pencil balanced on its point (so it’s standing straight up) could support a moderate load. However, it would be almost impossible to apply that load without causing the pencil to fall over. MANY structures “fail” because they start to lean – and the leaning loads one side of the structure more than the other. Again, once one portion of a Structure breaks, the rest of the Structure will generally fail in a “domino effect”.
Manufacturability
An elegant design that is impossible to construct is of little value. The designs the team considers should be a balance between what will minimize the load on the elements (hold the most weight without breaking) and something they can build, test and learn from in the shortest amount of time. This would imply that teams would be well advised to consider building the simpler designs they think up first – and save the more complex designs for after they gain a bit of experience with construction technique.
Finish details
One of the KEYS to building REALLY strong structures is to spend enough time on “following through on the details” – to be sure the finished structures actually adhere to the intended design. For example, a wonderfully constructed structure could be turned into a “leaning tower of Pisa” unless it is checked to be sure it is “plumb”. Similarly, the team should check to make sure that all parts they expect to carry load actually contact the upper and lower surfaces of the tester!! Overlooking this “finish detail” could leave one leg “hanging in mid air” – and unable to support any load (and likely torquing the Structure as weight is applied).
Water in the air can become trapped in the structure. This means that the more humidity there is, the heavier a structure will become. Many teams try to remove some of this moisture from balsa structures before Weigh-in. Some of these teams learn that Glues can degrade when exposed to extreme heat (so the Structure is weaker after drying than it was before). Consequently, teams should carefully brainstorm, quantify and test any techniques they consider using for removing water from their structures to be sure they understand what the impact will be on both the structure weight AND the structure strength before they use that technique on their competition Structure.
Weight placement issues
The PROCESS of placing weights on the structure is an area many first-time structure teams don’t give sufficient attention. The order weights are placed, the positioning of the weights and even such details as the hand positioning of the people placing weights can impact the stresses the structure experiences during weight placement. Planning, practice, brain-storming of the issues and more practice is key. Again, since this is a key aspect of this solution, the team must decide which issues they wish to consider – as well as how these issues will be resolved. However, Team Managers CAN point out that teams need to spend time considering how “weight placement issues” might impact the load the team’s Structure experiences.
After all, weight placement during the tournament is the “focal event” for a structure team’s year. Consequently, it makes sense for there to be as much thought, planning and practice for this aspect of the teams presentation as there is for others. At the very least, the team should have a plan –- and contingency plans – so they don’t have to make any “snap decisions” they might regret.
A final comment
The goal of Destination Imagination is to encourage the kids to learn, stretch themselves and have fun. Kids that really enjoy the Engineering Challenge will begin to see the “structure” in everything around them. They will wonder WHY things they see are designed the way they are. They will also be able to recognize and admire the “design elegance” they see in natural structures. This awareness, appreciation and curiosity is perhaps the greatest benefit this Challenge has to offer. It is certainly not interference for a Team Manager to encourage teams to question and explore how the “real world” deals with the issues they are trying to resolve. After all, that is part of what this process is all about!!